At Elston Materials, we pride ourselves in providing the best quality materials on the market. If you find yourself buying concrete for a project, here are some helpful tips for pouring concrete.
Tips for Pouring Concrete
Site Preparation
To ensure that your project goes smoothly, you need to prepare your site before pouring concrete. If you don’t, there can be complications later on that could have been avoided. Make sure the area you’re pouring concrete in is cleaned and cleared. This includes things like trees, rocks, grass, and even old concrete. People often use earth moving equipment like backhoes and excavators to speed up the clearing process. Creating a proper sub base is crucial to laying the groundwork for site prep. We recommend a sub base of at least 4 inches so that the concrete can cure properly.
Form Setting
Once you’ve made sure that your site is properly prepared, you can start setting your forms. Most often, people use wood forms that can be anywhere from 4 inches to several feet high. The concrete forms are vital for properly pouring the concrete in. The forms are usually held in place by wood or metal stakes and are set in place by nails or screws for easy removal. Make sure the forms have clean corners and are set to account for slope and drainage.
Concrete Placing
Now it’s time to start putting the Elston concrete materials to use. Since we provide mobile on-site delivery, you don’t have to worry about getting the concrete to your place. Another special aspect of our concrete, is that we mix the concrete on-site. This ensures that your concrete does not dry out or have to be used right away. Once delivered, the concrete will be poured into the forms, filling them all the way to the top. Once poured, the use of shovels and rakes will be implemented so that there are no air pockets and unfilled areas in the forms.
Finishing
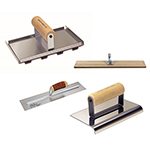
After the initial concrete is poured, you’ll then have a large wooden or metal board to screed the surface. What that means is that the wooden board will be pushed back and forth over the surface to smooth and level the concrete. Once this is completed, the concrete will then be floated. This is done by either small or large trowels depending on the project size. This further compacts the concrete and makes sure every part of the surface is leveled out. During the time, the joints and edges will be worked on using special hand tools.
Specialized Finish
Depending on the type of look you are going for, there will then be a specialized finish. The most common is the broom finish, where you simply pull a special broom across the surface to obtain a rough texture look. There are various other finishes, such as smooth trowel and tamped finish to name a couple.
Curing
Probably the most important aspect of the project, curing the concrete makes sure that your finished project is worth all the time and energy. This is one of the tips for pouring concrete that should be put to good use. The curing process usually lasts 28 with the first 2 days being the most important. Once the finishing process is completed, you should apply either a liquid chemical or sealing compound. The importance of curing is that in makes sure there is little to no cracks and surface discoloration. Keep in mind that the colder the temperature it is, the longer it will take concrete to properly cure. You should wait about 4 days before walking on the concrete and around 7 days to drive on the surface.




Pingback: buffalo bill tinder profile
Pingback: http://freedatingste.com
Pingback: free hispanic dating
Pingback: keto diet meal plan free